Unlock Faster Websites & Better SEO: The Ultimate Guide to Image Compression
In today's fast-paced digital world, attention spans are short. If your website takes too long to load, visitors will leave. One of the biggest culprits behind slow load times? Large, unoptimized images.
But don't worry, there's a powerful solution: image compression.
Whether you're a website owner, blogger, developer, marketer, or just someone who shares photos online, understanding and utilizing image compression is no longer optional—it's essential. People frequently search for ways to "reduce image size," "compress JPG online," or figure out "how to compress images without losing quality." This guide will answer those questions and more.
Let's dive into why image compression matters and how you can do it effectively.
Why Bother Compressing Images? The Undeniable Benefits
Compressing images might seem like an extra step, but the payoff is huge. Here’s why it’s critical:
- Blazing-Fast Website Speed: This is the #1 reason. Smaller image files mean less data to download, leading to significantly faster page load times. Faster sites keep users happy and engaged.
- Improved SEO Rankings: Search engines like Google prioritize user experience, and site speed is a major ranking factor. Optimized images contribute directly to better SEO performance, helping your content get discovered.
- Enhanced User Experience (UX): Nobody enjoys waiting for images to load, especially on mobile devices. Fast-loading visuals create a smoother, more professional, and less frustrating experience for your visitors.
- Reduced Bandwidth Consumption: Smaller images consume less bandwidth for both your server and your visitors. This can lead to lower hosting costs and is considerate for users on limited data plans.
- Efficient Storage: Compressed images take up less storage space on your server or device.
- Easier Sharing: Smaller files are quicker and easier to upload and share via email, social media, or messaging apps.
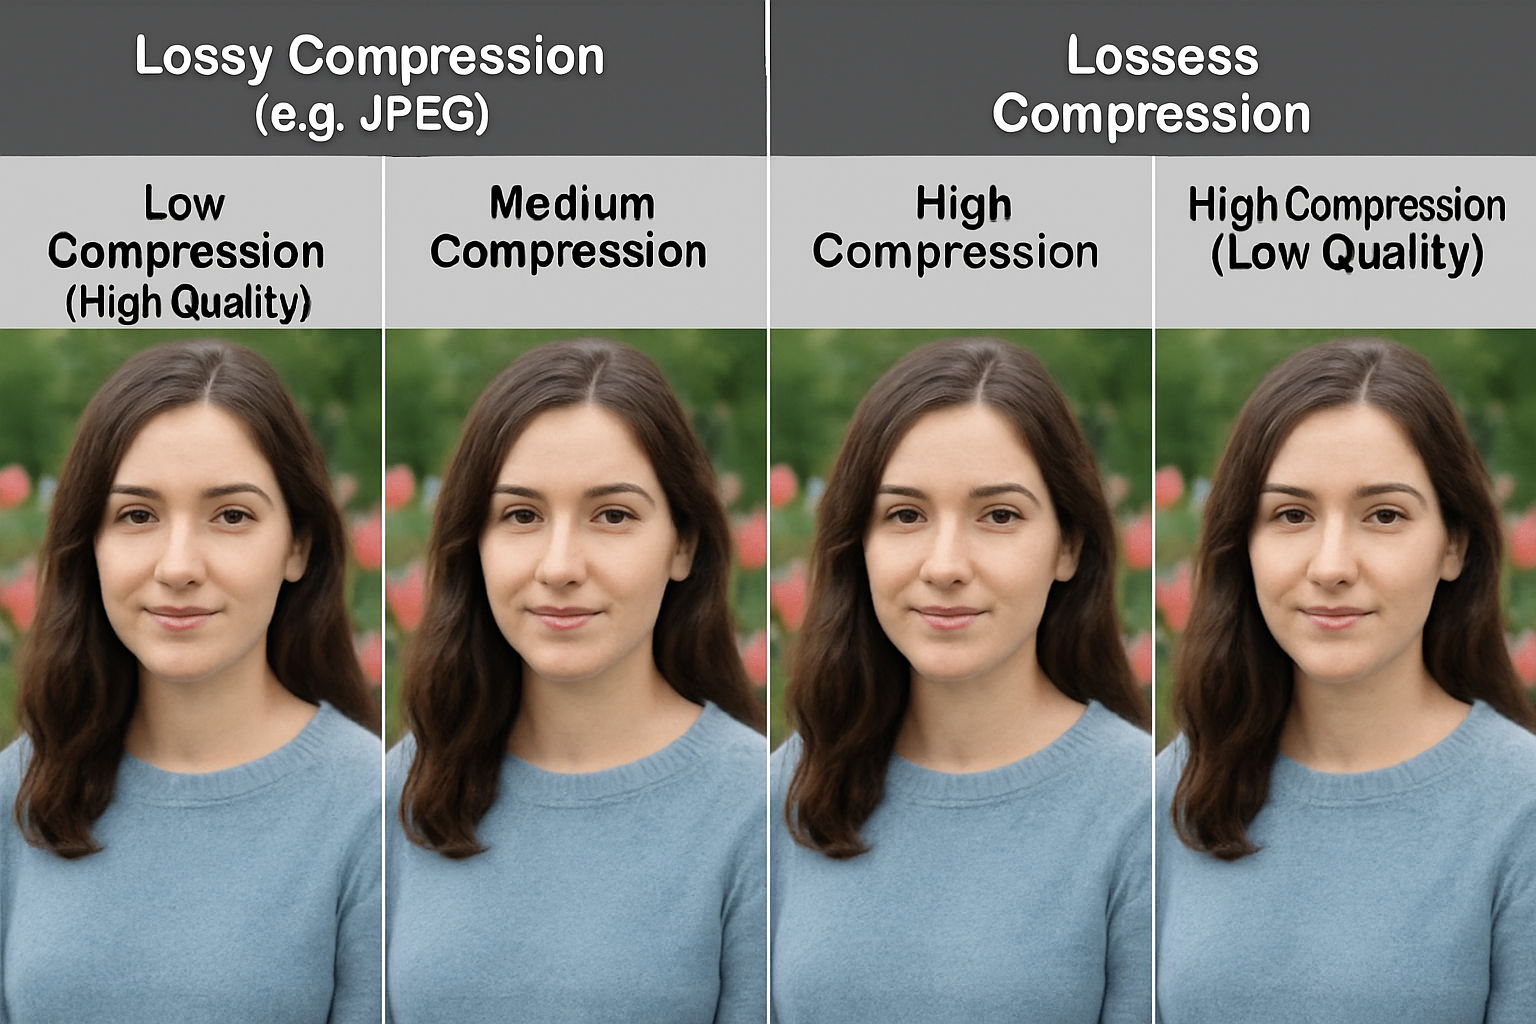
How Does Image Compression Work? Lossy vs. Lossless Explained
Image compression algorithms work by reducing the amount of data needed to represent an image. There are two main types:
Lossless Compression:
- What it does: Reduces file size without any loss of image quality. It works by identifying and eliminating redundant data in the file. Think of it like putting files in a ZIP archive – you can unzip them later and get the exact originals back.
- Pros: Perfect image quality preservation.
- Cons: Achieves smaller file size reductions compared to lossy.
- Best for: Images where absolute detail is critical (e.g., technical diagrams, medical images, graphics with sharp lines or text, PNGs).
Lossy Compression:
- What it does: Significantly reduces file size by selectively removing some image data that the human eye is less likely to notice. This process is irreversible – you can't perfectly reconstruct the original image from the compressed version.
- Pros: Achieves much higher compression ratios (much smaller files).
- Cons: Can result in some quality degradation if overdone.
- Best for: Photographs and complex images where minor data loss isn't noticeable (e.g., JPEGs, WebP).
The Key Takeaway: Most online image compression tools use lossy compression because it offers the best balance between file size reduction and acceptable visual quality for web use. The trick is finding the sweet spot.
Choosing the Right Format: JPG vs. PNG vs. WebP
The file format you choose also impacts compression and quality:
- JPEG (or JPG -
.jpg,.jpeg):- Uses: Best for photographs and complex images with millions of colors and smooth gradients.
- Compression: Uses lossy compression. Great for significantly reducing the file size of photos.
- Transparency: Does NOT support transparency. Transparent areas will typically be filled with white.
- PNG (
.png):- Uses: Ideal for graphics with sharp lines, text, logos, icons, and images requiring transparency (like logos on a colored background).
- Compression: Uses lossless compression. File sizes can be larger than JPEGs, especially for photos, but quality is perfectly preserved.
- Transparency: Supports full alpha transparency.
- WebP (
.webp):- Uses: A modern format developed by Google designed as a replacement for JPG, PNG, and GIF. It supports both lossy and lossless compression, as well as transparency and animation.
- Compression: Offers significantly better compression (smaller file sizes) than JPG and PNG at comparable visual quality.
- Transparency: Supports transparency.
- Compatibility: Excellent support in modern browsers (Chrome, Firefox, Edge, Safari 14+). It's rapidly becoming the preferred format for the web.
Recommendation: Use WebP whenever possible for the best combination of quality and small file size. Use JPEG for photos if WebP isn't an option or maximum compatibility is needed. Use PNG for graphics requiring perfect detail and transparency.
Maintaining Quality: The Compression Balancing Act
A common fear is: "Will compressing my images make them look terrible?"
Not necessarily! Modern compression tools (like IMGCompress) give you control. Look for a "Quality" slider or setting (usually a percentage from 1 to 100).
- Lower Quality Setting (e.g., 40%): Higher compression, smallest file size, but more noticeable quality loss (artifacts, blurriness).
- Higher Quality Setting (e.g., 85%): Lower compression, larger file size, but visually almost identical to the original.
Finding the Sweet Spot:
Start with a quality setting around 70-85% for JPEGs and lossy WebP. Preview the compressed image next to the original. Can you see a significant difference? If not, you might even be able to lower the quality further. If the quality loss is too noticeable, increase the setting slightly. The goal is the smallest file size with acceptable visual quality for its intended use.
How to Compress Your Images Easily (Like with IMGCompress!)
You don't need complex software. Free online tools make compression incredibly simple:
- Choose a Tool: Select a reliable online image compressor (like ours, IMGCompress!). Prioritize tools that process images in your browser for privacy.
- Upload Your Image: Drag and drop your JPG, PNG, or WebP file onto the tool or use the file selection button.
- Adjust Settings:
- Select your desired output format (JPG, PNG, WebP). Often, choosing WebP yields the best results.
- Adjust the Quality slider to balance size and visual fidelity. Preview the results.
- Compress: Click the "Compress" button.
- Download: The tool will show you the original vs. compressed size and the percentage reduction. Download your optimized image!
Best Practices for Image Optimization
- Choose the Right Format: Use JPG/WebP for photos, PNG/WebP for graphics with transparency.
- Compress Wisely: Don't over-compress. Find the quality balance that works for your needs. Aim for significant size reduction without obvious visual degradation.
- Resize Before Compressing (If Necessary): If an image is physically larger (e.g., 4000px wide) than needed for your website (e.g., 800px wide), resize it to the correct dimensions first, then compress. Compression works on file size, not pixel dimensions.
- Use Descriptive Filenames: Name your images clearly (e.g.,
blue-widget-side-view.jpginstead ofIMG_0012.jpg). This helps with SEO. - Test Your Site Speed: After optimizing images, use tools like Google PageSpeed Insights to measure the improvement.
Conclusion: Make Compression Part of Your Workflow
Image compression isn't just a technical tweak; it's a fundamental aspect of creating fast, user-friendly, and SEO-optimized websites and digital content. By understanding the basics of lossy vs. lossless, choosing the right formats, and using easy online tools, you can dramatically reduce file sizes without sacrificing essential quality.
Stop letting large images slow you down. Start compressing today and experience the benefits of a faster, more efficient online presence.